
Obtaining a Token
Why do you need a GitHub Token? Because the entire compilation and packaging process relies on the GitHub platform, a GitHub token is required to perform these operations. GitHub is an open platform where anyone can create an account and obtain a permanently free token. We sincerely appreciate GitHub's free services. Obtaining a token is simple—if you don't have an account, register one first, then create a token in your personal settings.
Steps to Register on GitHub
- Visit the GitHub homepage: https://github.com/
- Click the
Sign upbutton in the top-right corner to go to the registration page. - Fill in your registration details, including username, email, password, etc.
- Click the
Sign up for GitHubbutton to complete registration.
Steps to Create a Token
Token Permission Requirements:
All repositories: Required to fork the original template repository
Actions: Used to execute GitHub Actions for packaging and compilation
Administration: Required for forking repositories and file management
Contents: Allows adding/deleting/modifying/searching files in the PakePlus repository
Issues: Enables submitting compilation errors or other issues to PakePlus
Workflows: Used to compile and package your software
Log in to your GitHub account.
Click your profile picture in the top-right corner to go to your personal dashboard.
Click the
Settingsbutton to enter the settings page.In the left-hand menu, click
Developer settingsto access developer options.In the left-hand menu, click
Personal access tokensto go to the token management page.Click
Generate new tokento create a new token.
GitHub offers two types of tokens—either will work. Use the links below to go directly:
Personal access tokens (classic)
or
Fine-grained personal access tokens.For Personal access tokens (classic):
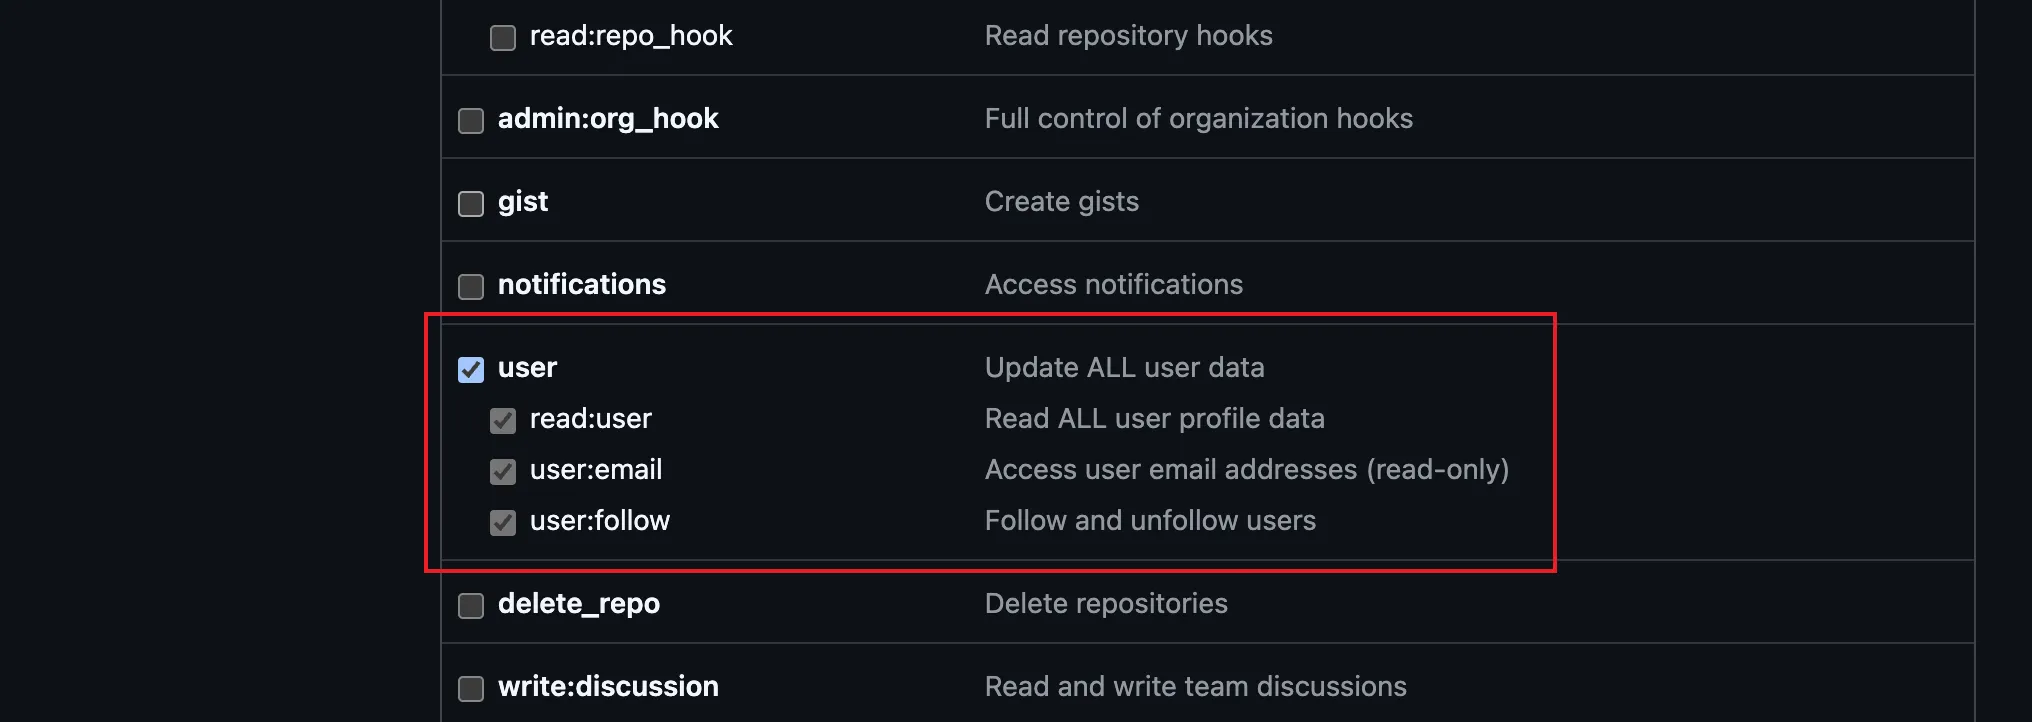
Simply check the following three permissions: .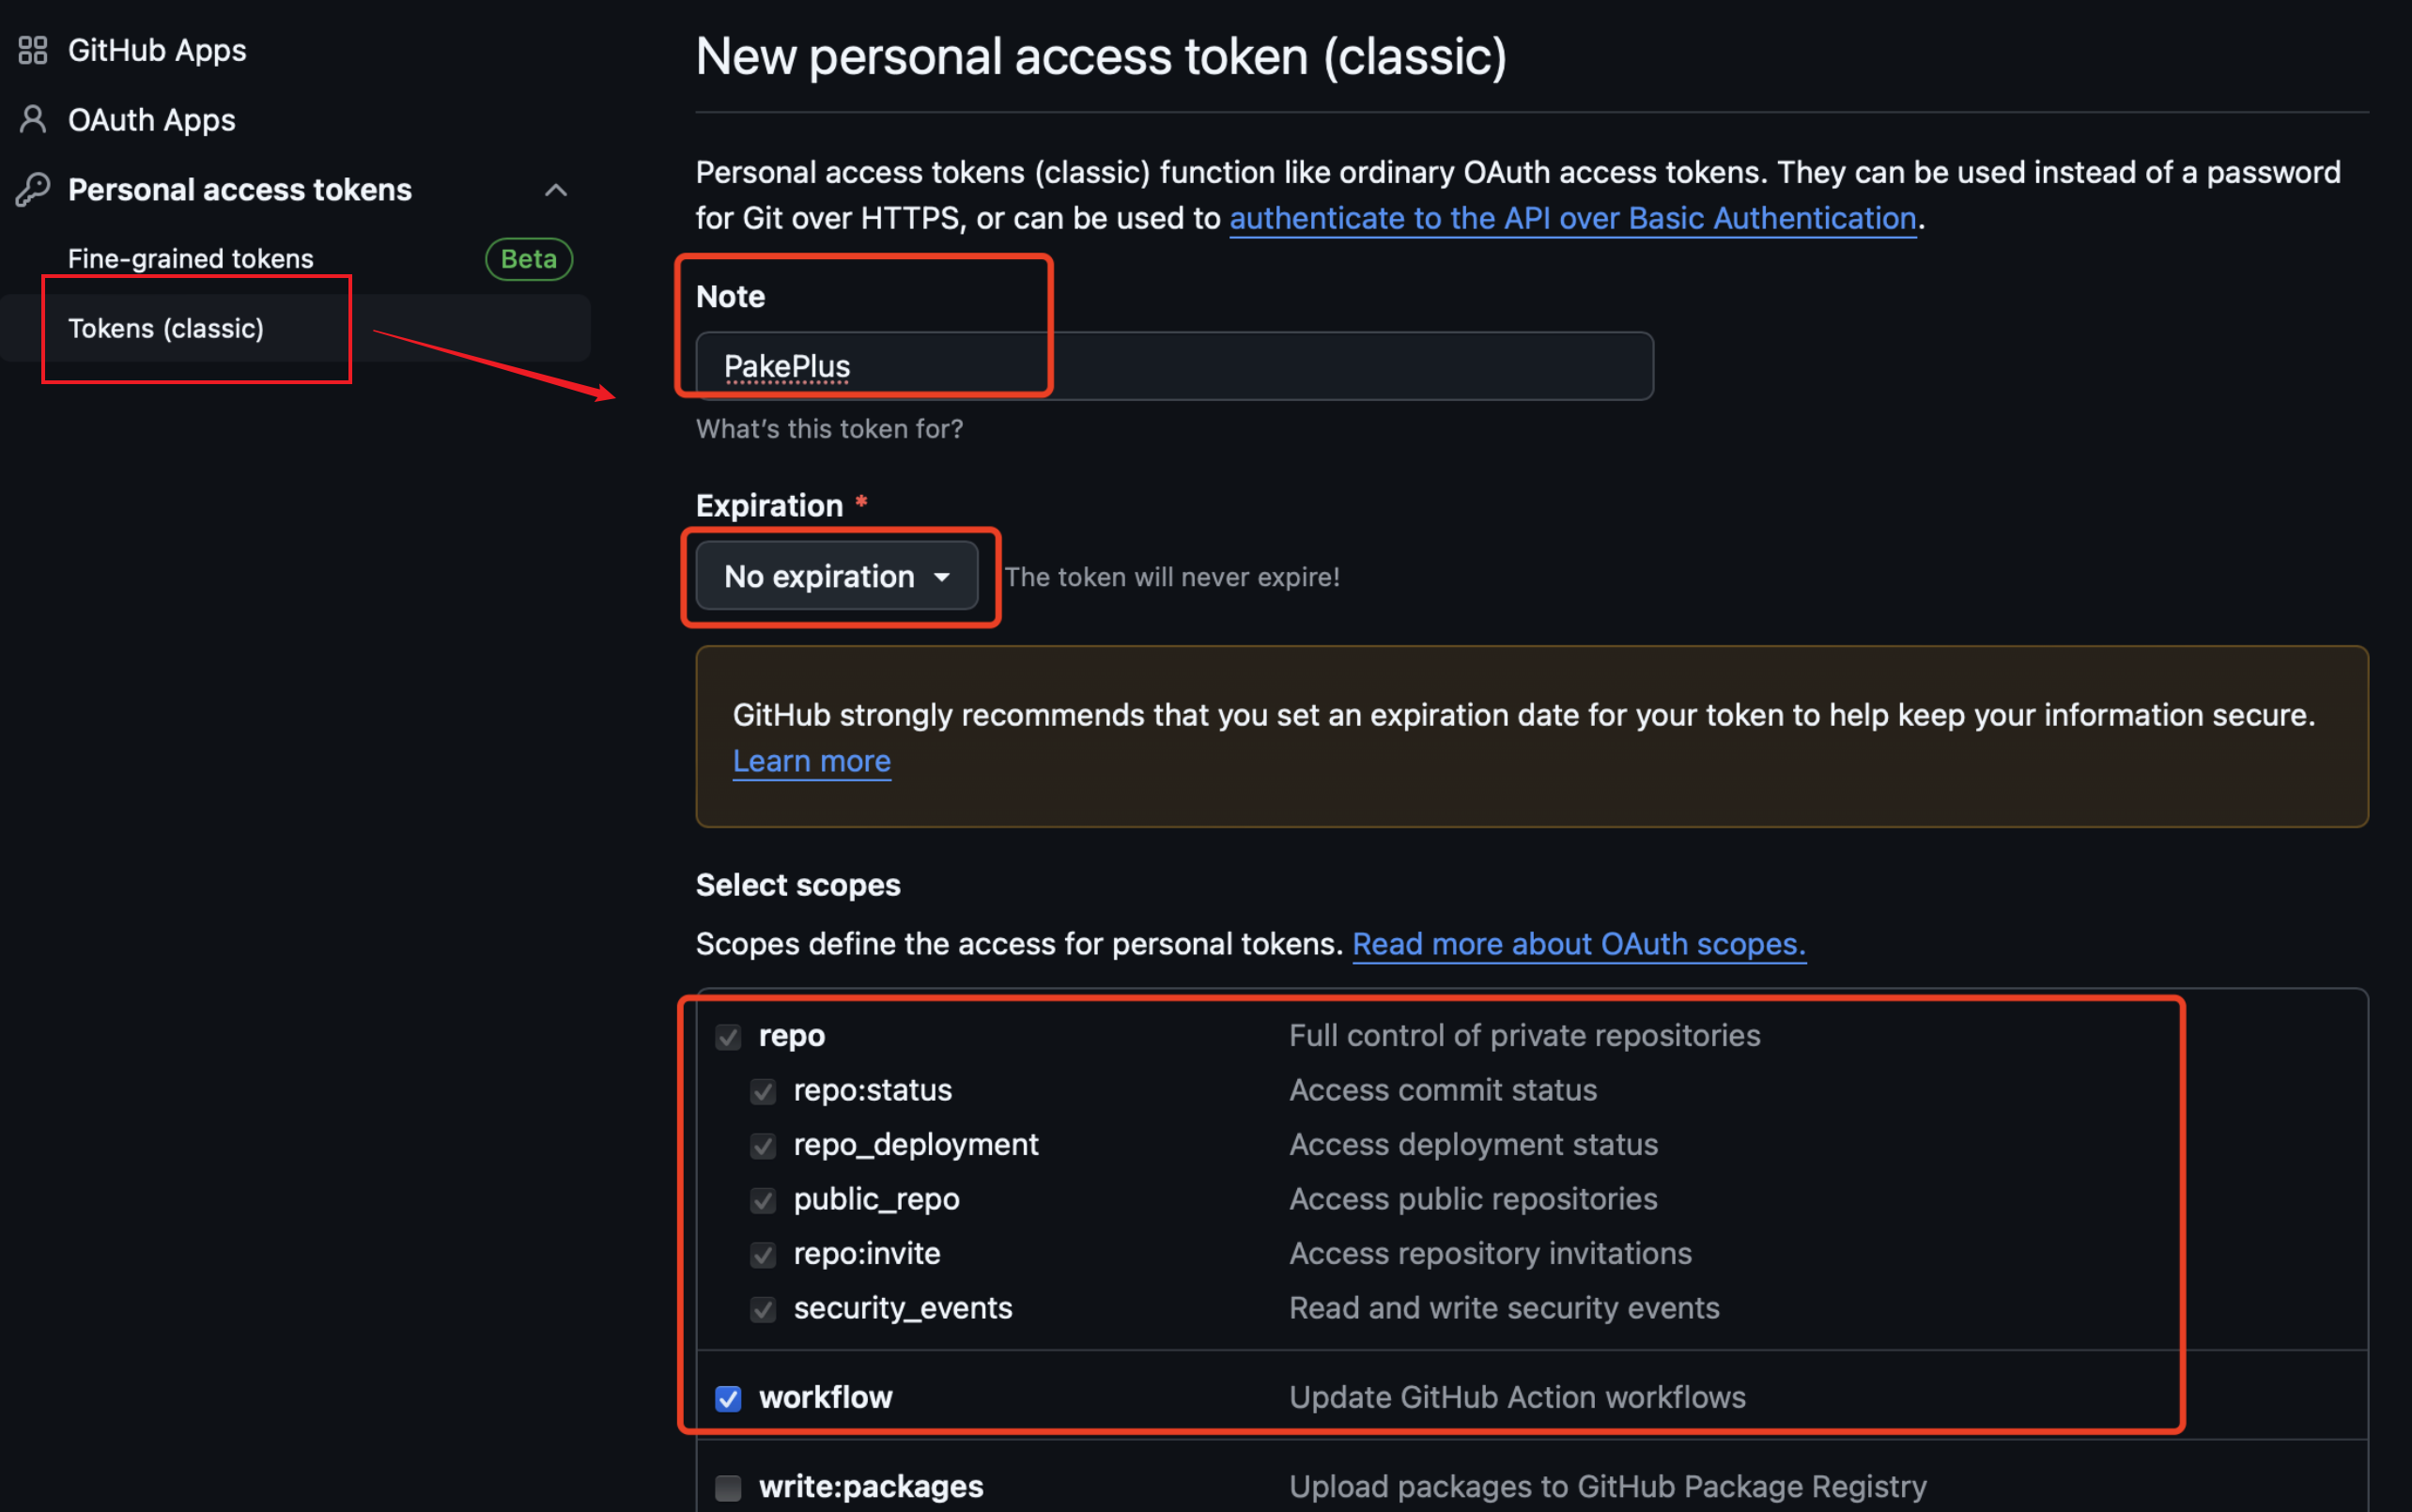
Then copy the generated token into PakePlus: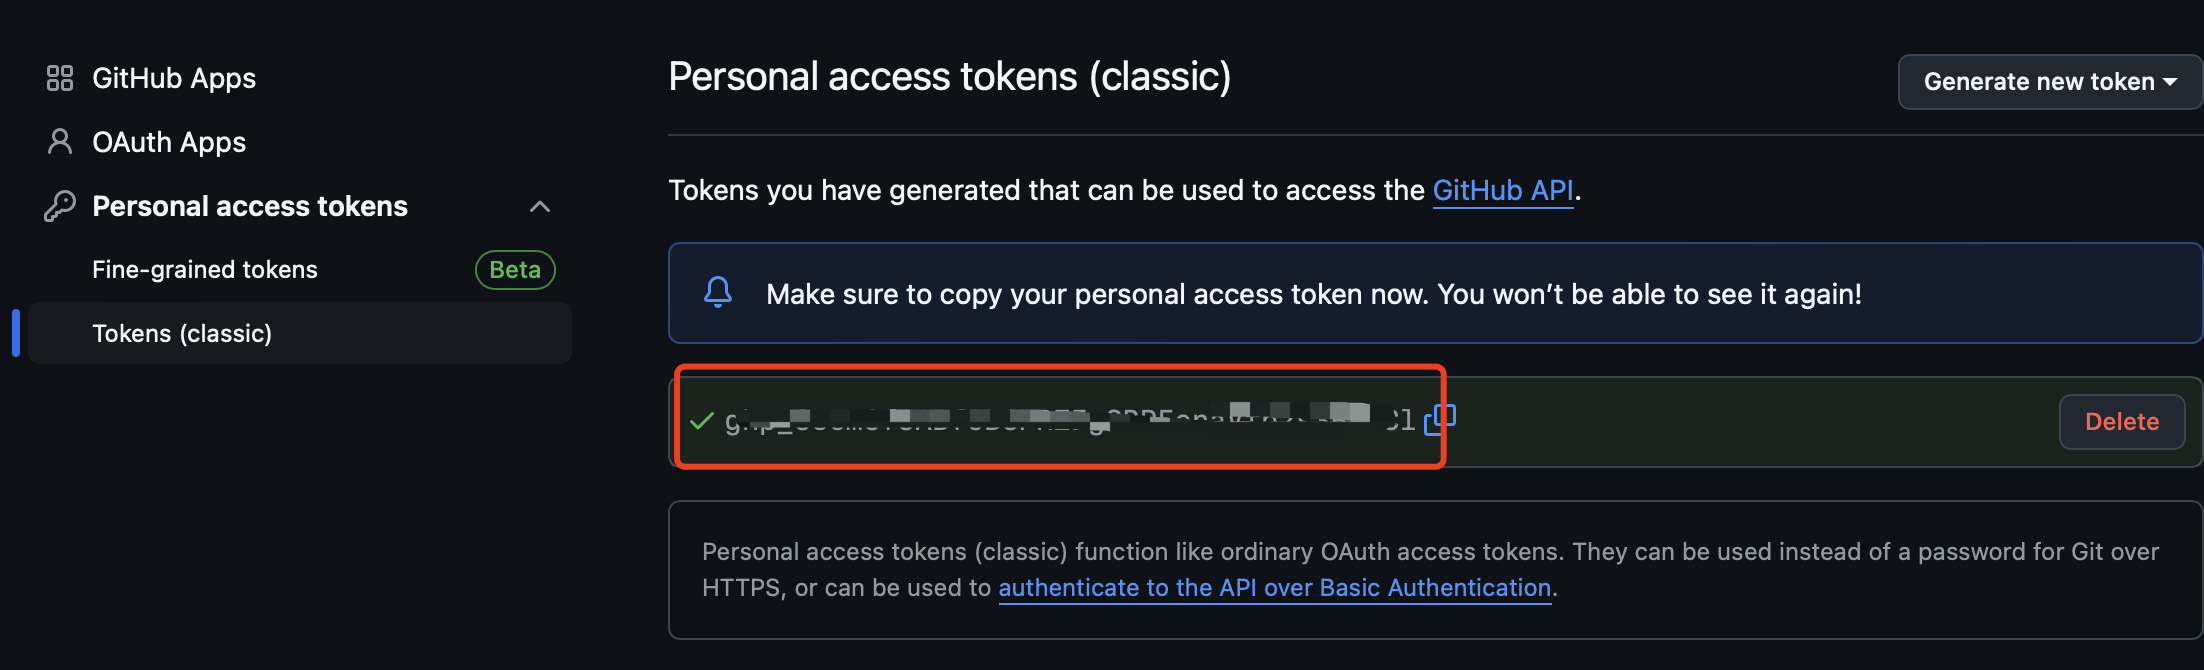
For Fine-grained personal access tokens: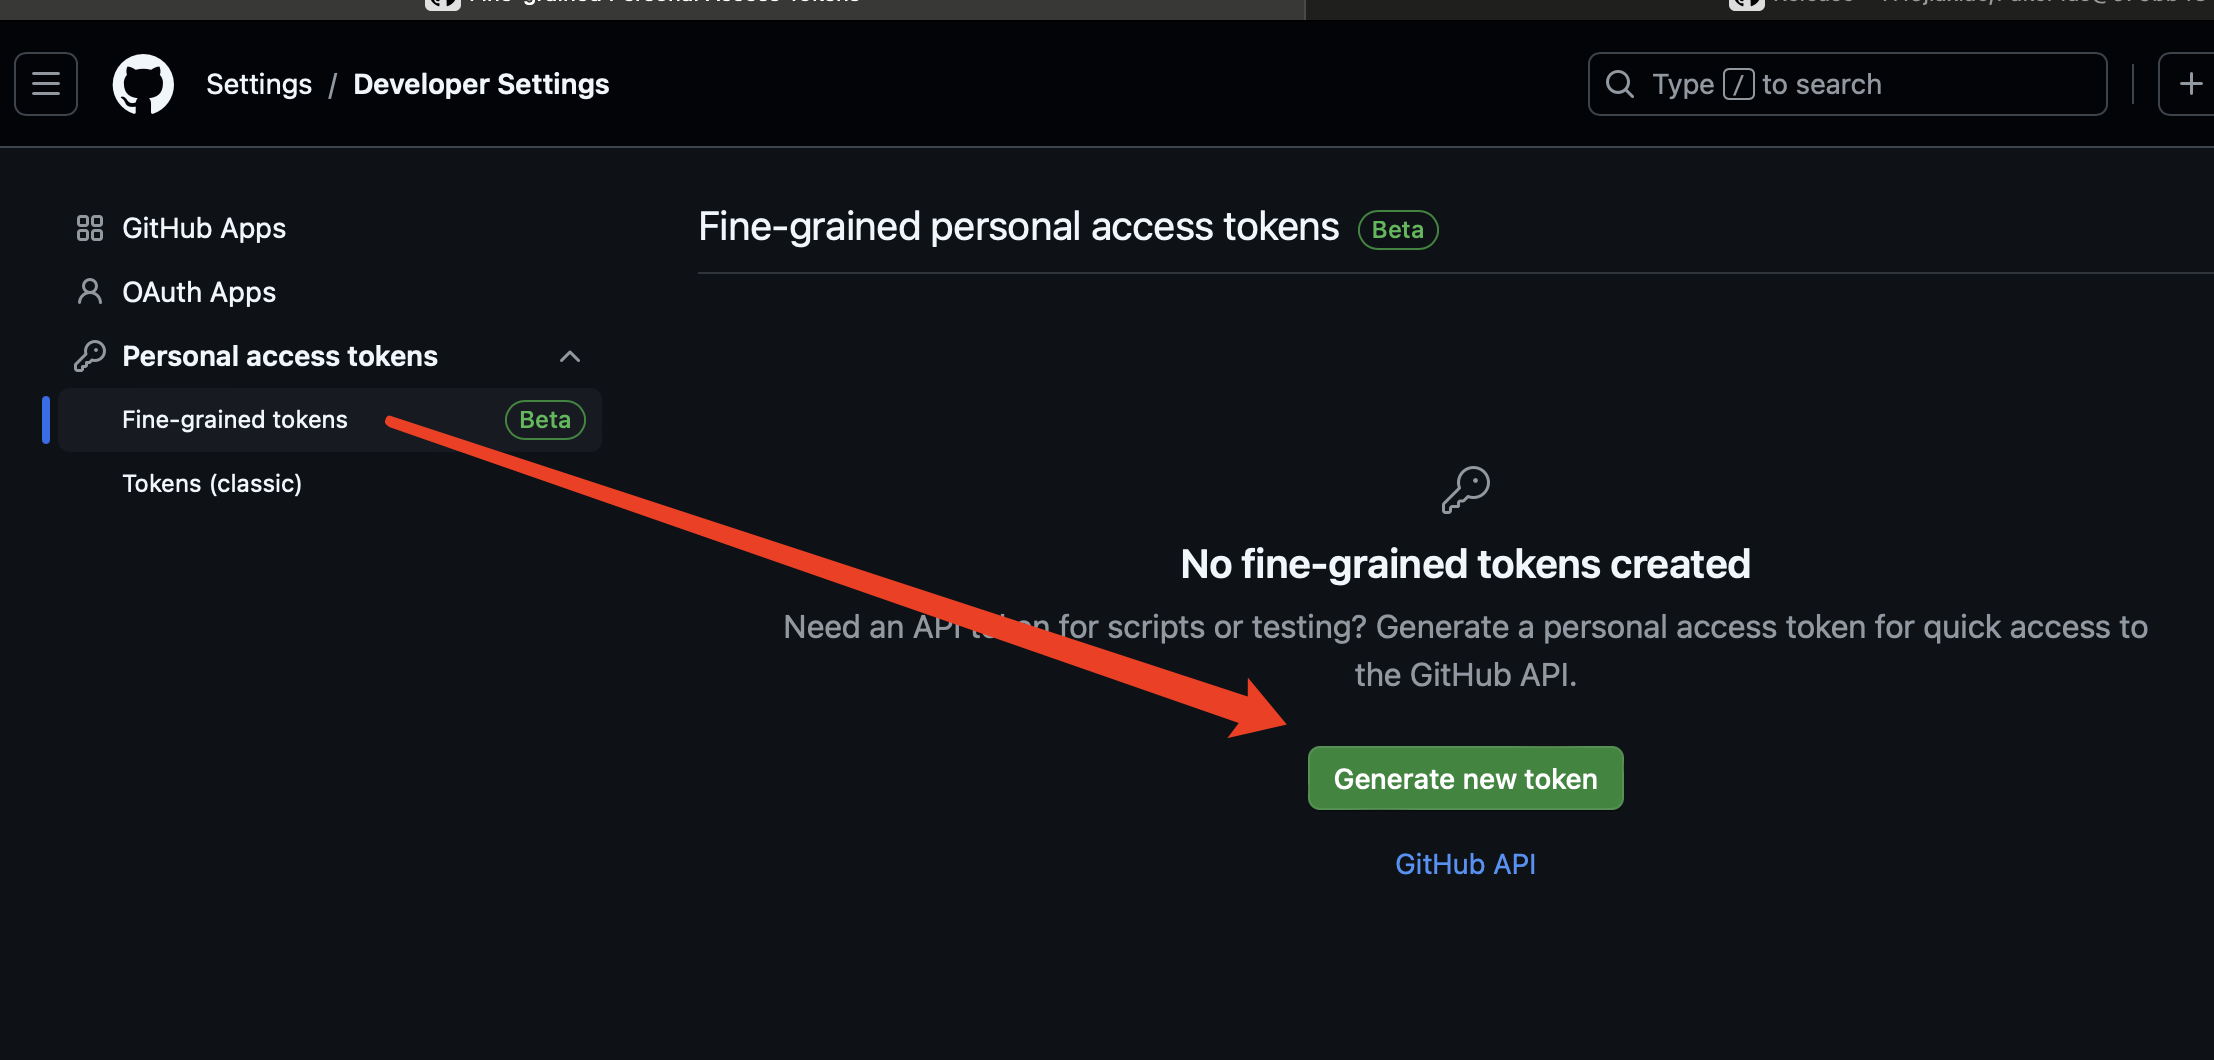
- Click
Generate new token. - Enter a token name, set expiration to "No expiration," and add an optional description.
- Select
All repositories.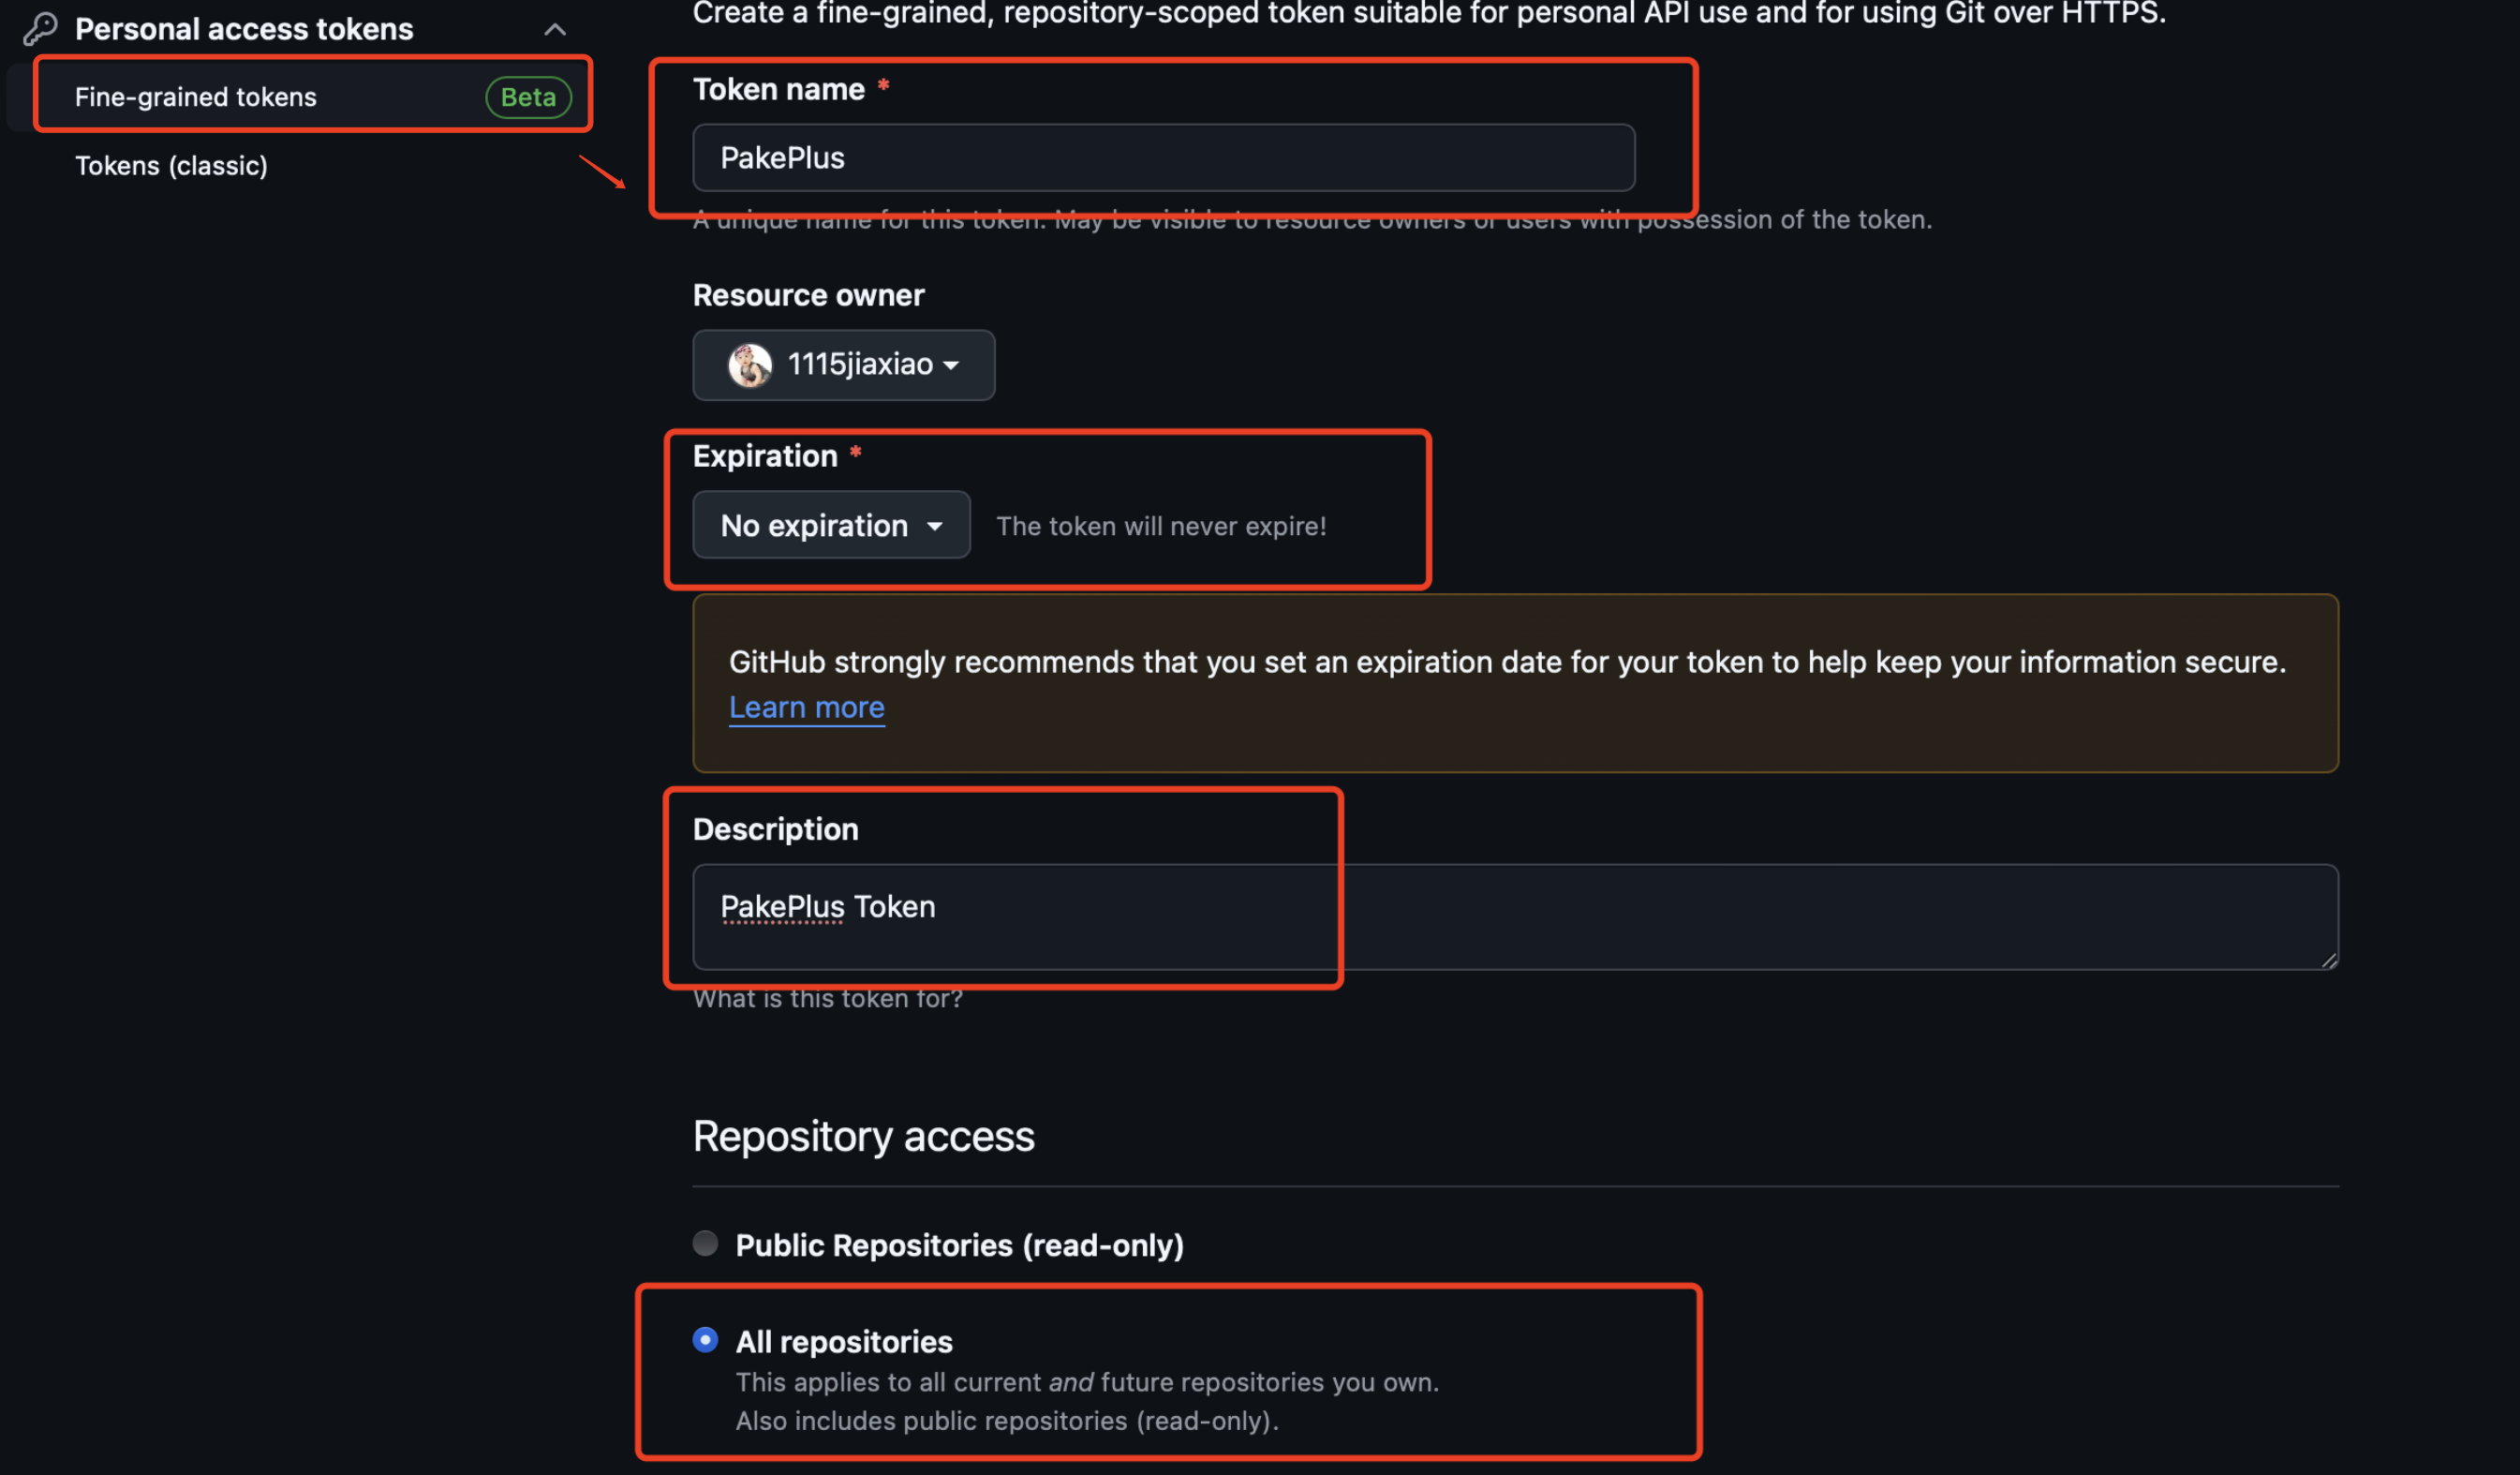
- Configure permissions: Grant the permissions marked in red boxes. Set Access to:
Read and write.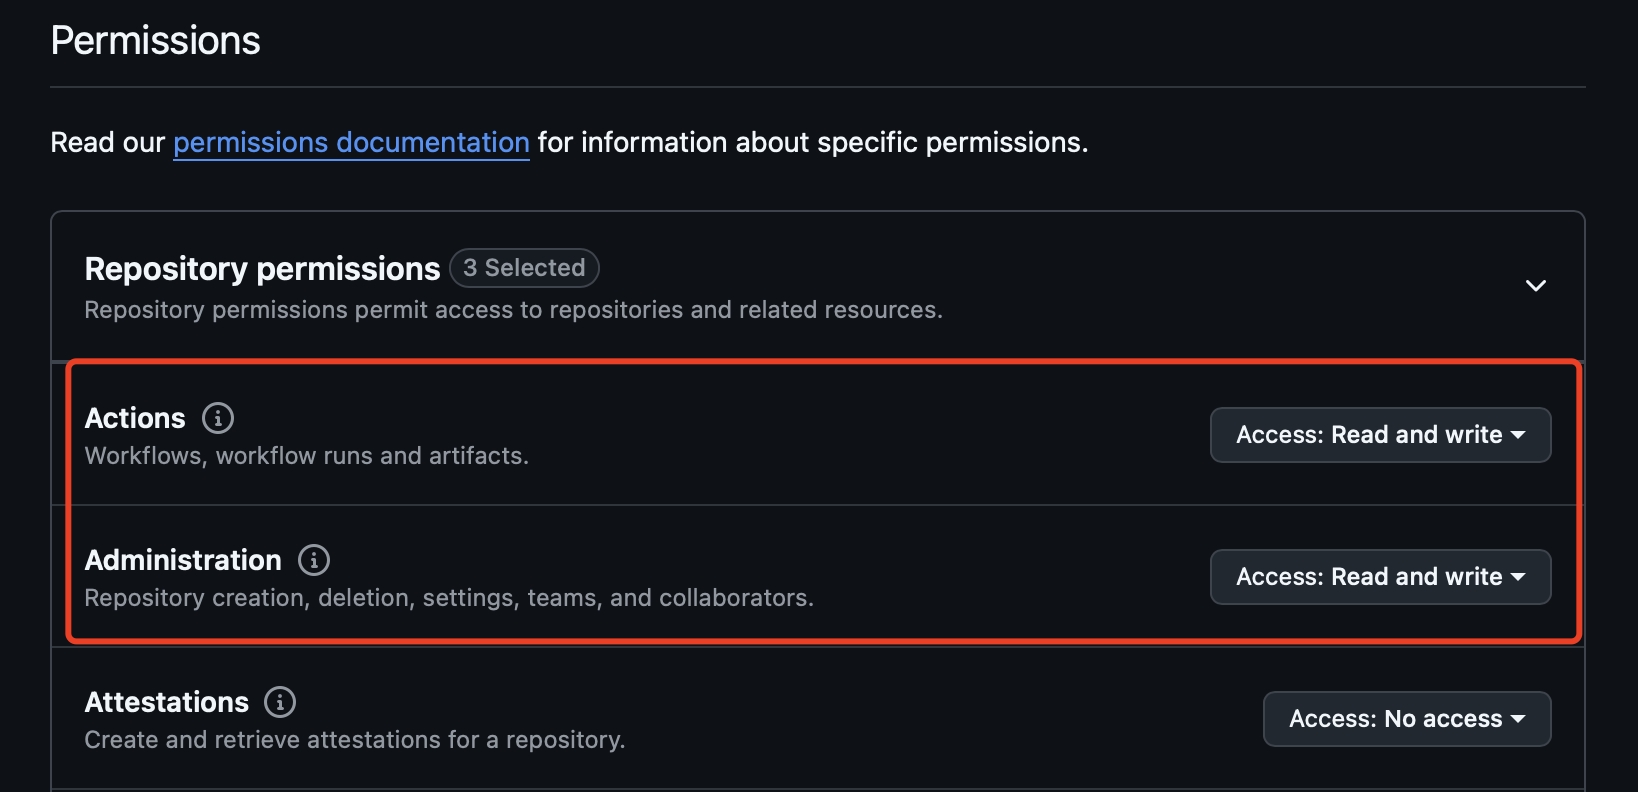


- Click
Generate tokenat the bottom to obtain your token: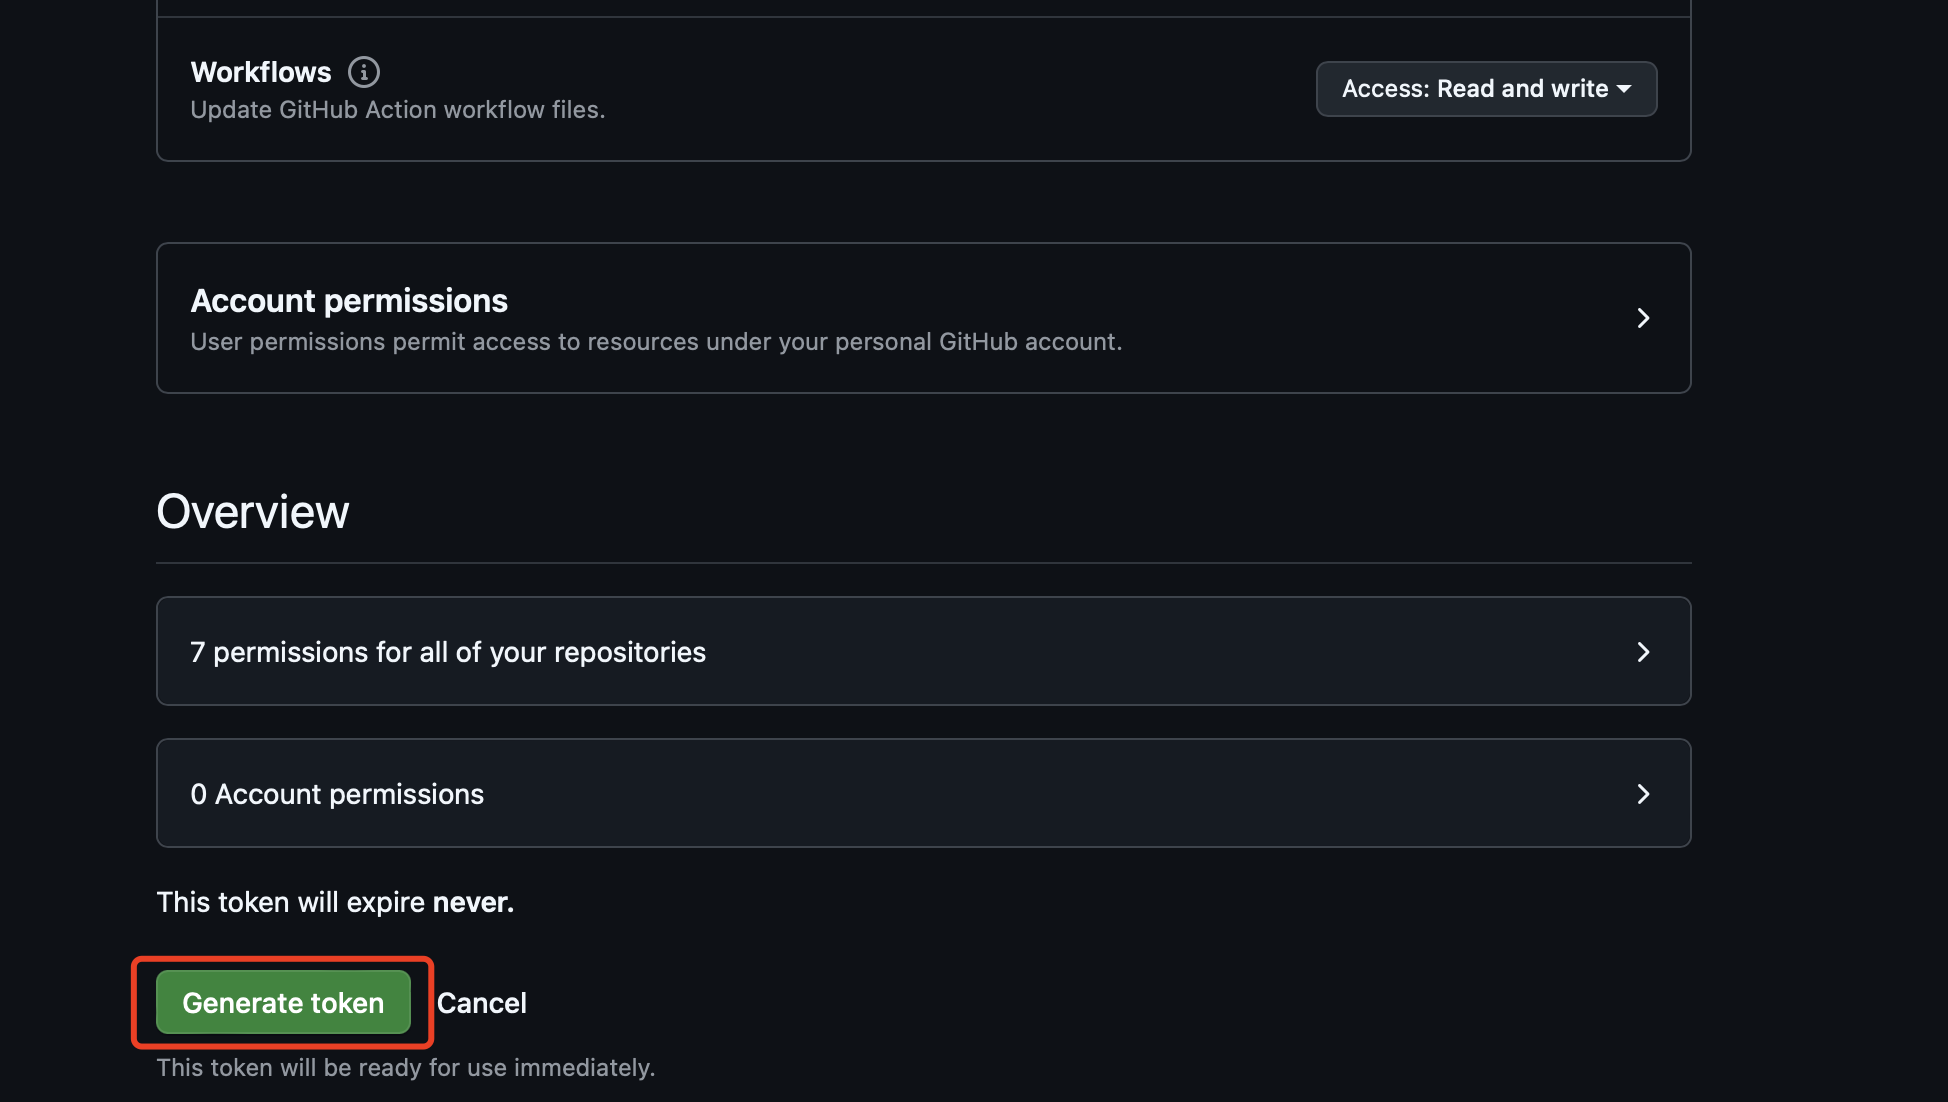
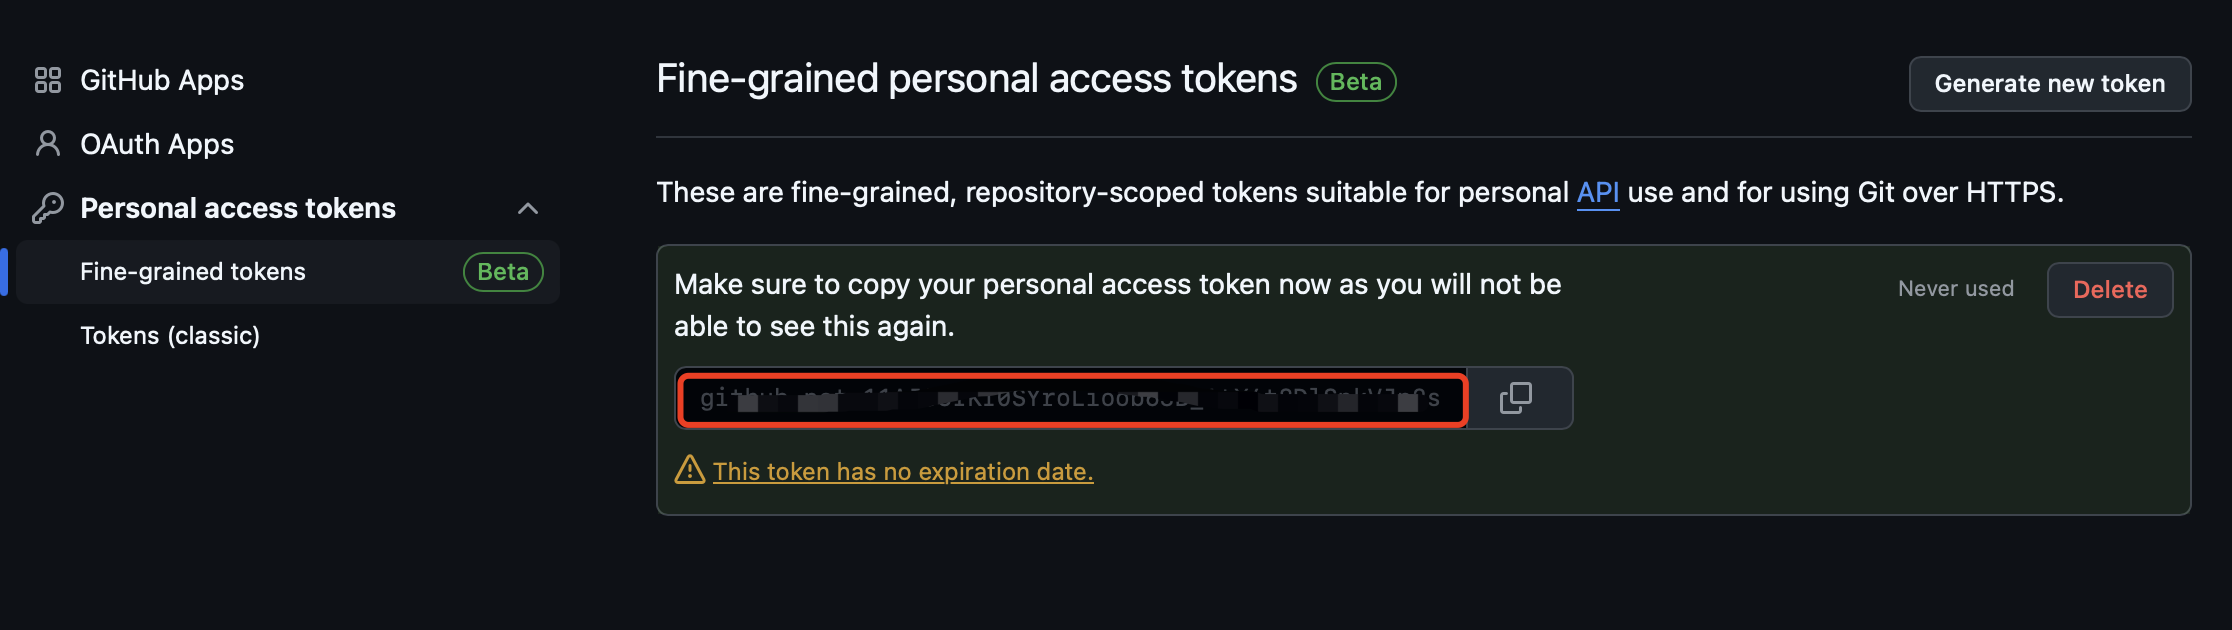
- Copy the token into PakePlus to start using it:
- Click
Test the Token
Open PakePlus, click the settings button in the top-right corner, paste the token obtained in Step 7 or 8, and click "Test." If it shows "Token is valid," you're all set!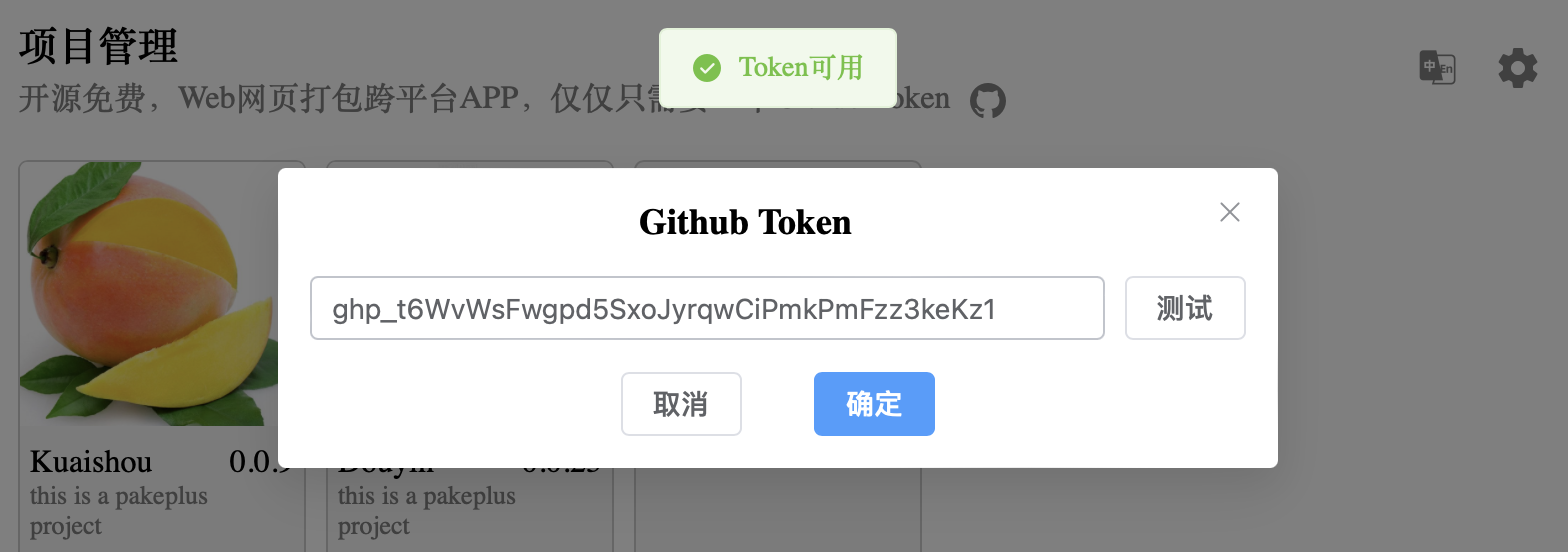
Important Notes
- You can only view the token once after generation—keep it secure.
- The token should only be stored locally on your computer—do not share it.
- If you set an expiration date, the token will only work within its validity period. You’ll need to generate a new one after it expires.